
With the synoptic project finally at an end, I thought that I would make a blog post to talk about the overall experience. This blog post will be addressing all aspects of the project from teamwork, to my own personal development.
Teamwork & Communication
It goes without saying that teamwork and communication is key in any project, no matter what industry you’re in. For our project, I’d say that we worked and communicated well as a team for the most part. From the get go, it was going to be a somewhat difficult task to communicate with two members of our team, considering that they were both in a different class and were timetabled into college on different days; this was overcome almost immediately and we figured a way around this by creating a timetable for our group. However as we got further into the project, teamwork and communication dropped slightly. This was mainly due to team members not turning up on time to sessions, or simply just not turning up at all; whether this being due to personal issues or even just not bothering to contribute to the project and when they did, the work was rushed and broken. This is mainly directed at one team member.
On the other hand, another team member would not take into account feedback or suggestions from myself or other members of the team to help improve their work and if improvements were made they were unnoticeable, which to say the least was irritating. This resulted in constant misunderstandings and therefore lack of good communication between this individual and the rest of the team. As well as this the work ethic for these team members were appalling and their priorities were certainly in the wrong place. Hopefully these team members know who they are. Due to these individuals, the teamwork and communication dropped within our team resulting in only 3 out of 5 us actually communicating properly and managing to work together. Despite the two team members who I spoke about previously, I’d say that the rest of us did quite well with working together on trying to get the project done on time. If I’m completely honest, I think that we could’ve done better if the team was made of solid members throughout instead of just having 2 who didn’t have a clue what they were doing half of the time. If you exclude these members and their complete incompetence however, we did well to communicate and work together.
My Contribution For this section I’m simply going to be listing my contribution throughout the production stages:
- Storyboard Draft

- Concept Art (Character wardrobe and Mirror scene)


- Compiling Storyboard images to create final storyboard


- Refined story

- Photoshop concept tests


- The Script

- TV VFX test
- Scene correction Grain Removal
- Team Production Logo

- Clock Model

- Clock implementation
- Screen assets (later placed on computer screen)
- Mirror scene re-done
- Adding assets (news scene)
- Marketing Posters x3


- Rough/Submission Edit

- Final Edit Assist (With Jacob)
Documentation:
- Scrum Summary

- Script
- Short Film Inspirations sheet
- Weekly Jobs List
- Risk Assessment Part A and Part B
Personal development If I’m completely honest, I think I’ve definitely improved since the beginning of the project. In some areas I do believe I could’ve done better. Time management was one thing that I kind of struggled with at first, but I think now I’m more confident in using my time as evenly as I can. I also think that more to the end of the project my management skills have improved as well. I say this because near the beginning of the project I was more lenient towards my team mates which isn’t really ideal when having the role as project lead; so I believe that with me cracking down on team mates really helped me develop my team management skills and act more like a project lead.
Not only have I improved in these areas as a leader, but I have also improved in different programs as well, these being ones I’m familiar with already: After Effects, Premier Pro and Maya. I believe that in after effects my skills have improved even more than before using a variety of different effects to help blend objects into a scene, such as my clock model. In premier I believe that my edits have improved drastically as well, with me making more refined edits in footage in order to set up scenes correctly and etc. Finally, my skills in Maya have improved in the sense that I’ve managed to create nicer looking models and rendering them out to a high standard, using 3 point lighting and so on.
Conclusion If I were to sum the project up as a whole, it’s definitely been a notable experience for everyone. We’ve experienced the difficulty of recruiting actors and even working together as a team. I believe that if we had a smaller team with more enthusiastic teammates then I think that the overall production process would’ve turned out a lot better, this is because closer to the end of the project, only a couple of us were actually determined to finish the project off to a high standard. Overall though the project has definitely been a roller-coaster of an experience.

 This poster was done last since it was the easiest to do. I would personally class this as a teaser poster due to it just being the title of the short film. This leaves the audience to wonder what the film could be about and what kind of tone the film has to it, leaving them to guess away at the title alone.
 This, out of all the posters, was the one I spent the most time on. This is the what I would class as the ‘main movie poster’ which tells you everything you need to know on it. On the poster it tells you the cast of the film, the title of the film itself and even the film credits such as VFX Artists and etc. However the main focus for this poster was to show off the main character and how he looks once transformed into the murderous, villainous psychopath. Also I thought that darkening certain parts of the face and changing the colour scheme to black and white really helped the eye stand out and help draw the audiences attention to the poster even more.
 Instead of having the poster more detailed, I wanted to make the poster less detailed and more stylised. So I thought to myself, why not go for a minimalist/ simplistic sort of style instead. Surprisingly the style worked quite well and looked really nice as a result. The characters silhouette in front of a white grunge background alongside the ‘Remember : A Visuals Short’ text with a dark grunge texture on it, really made the poster stand out in my opinion.
 So you’re probably wondering, who is Ralph McQuarrie? Ralph McQuarrie was an American concept artist, designer and illustrator. His most notable artistic contribution being for the original Star Wars trilogy, however McQuarrie also created pieces for E.T – The Extra Terrestrial and Cocoon. However in this post I’ll just be covering his work on the original Star Wars Trilogy.
 One thing that many people don’t know about Ralph McQuarrie is that he started off in a dentistry firm drawing both teeth and equipment. Soon after his job at the dentistry firm, McQuarrie went on to work as a Preliminary Design Illustrator for the Boeing Company. Here he drew diagrams for manuals on constructing the 747 Jumbo Jet.
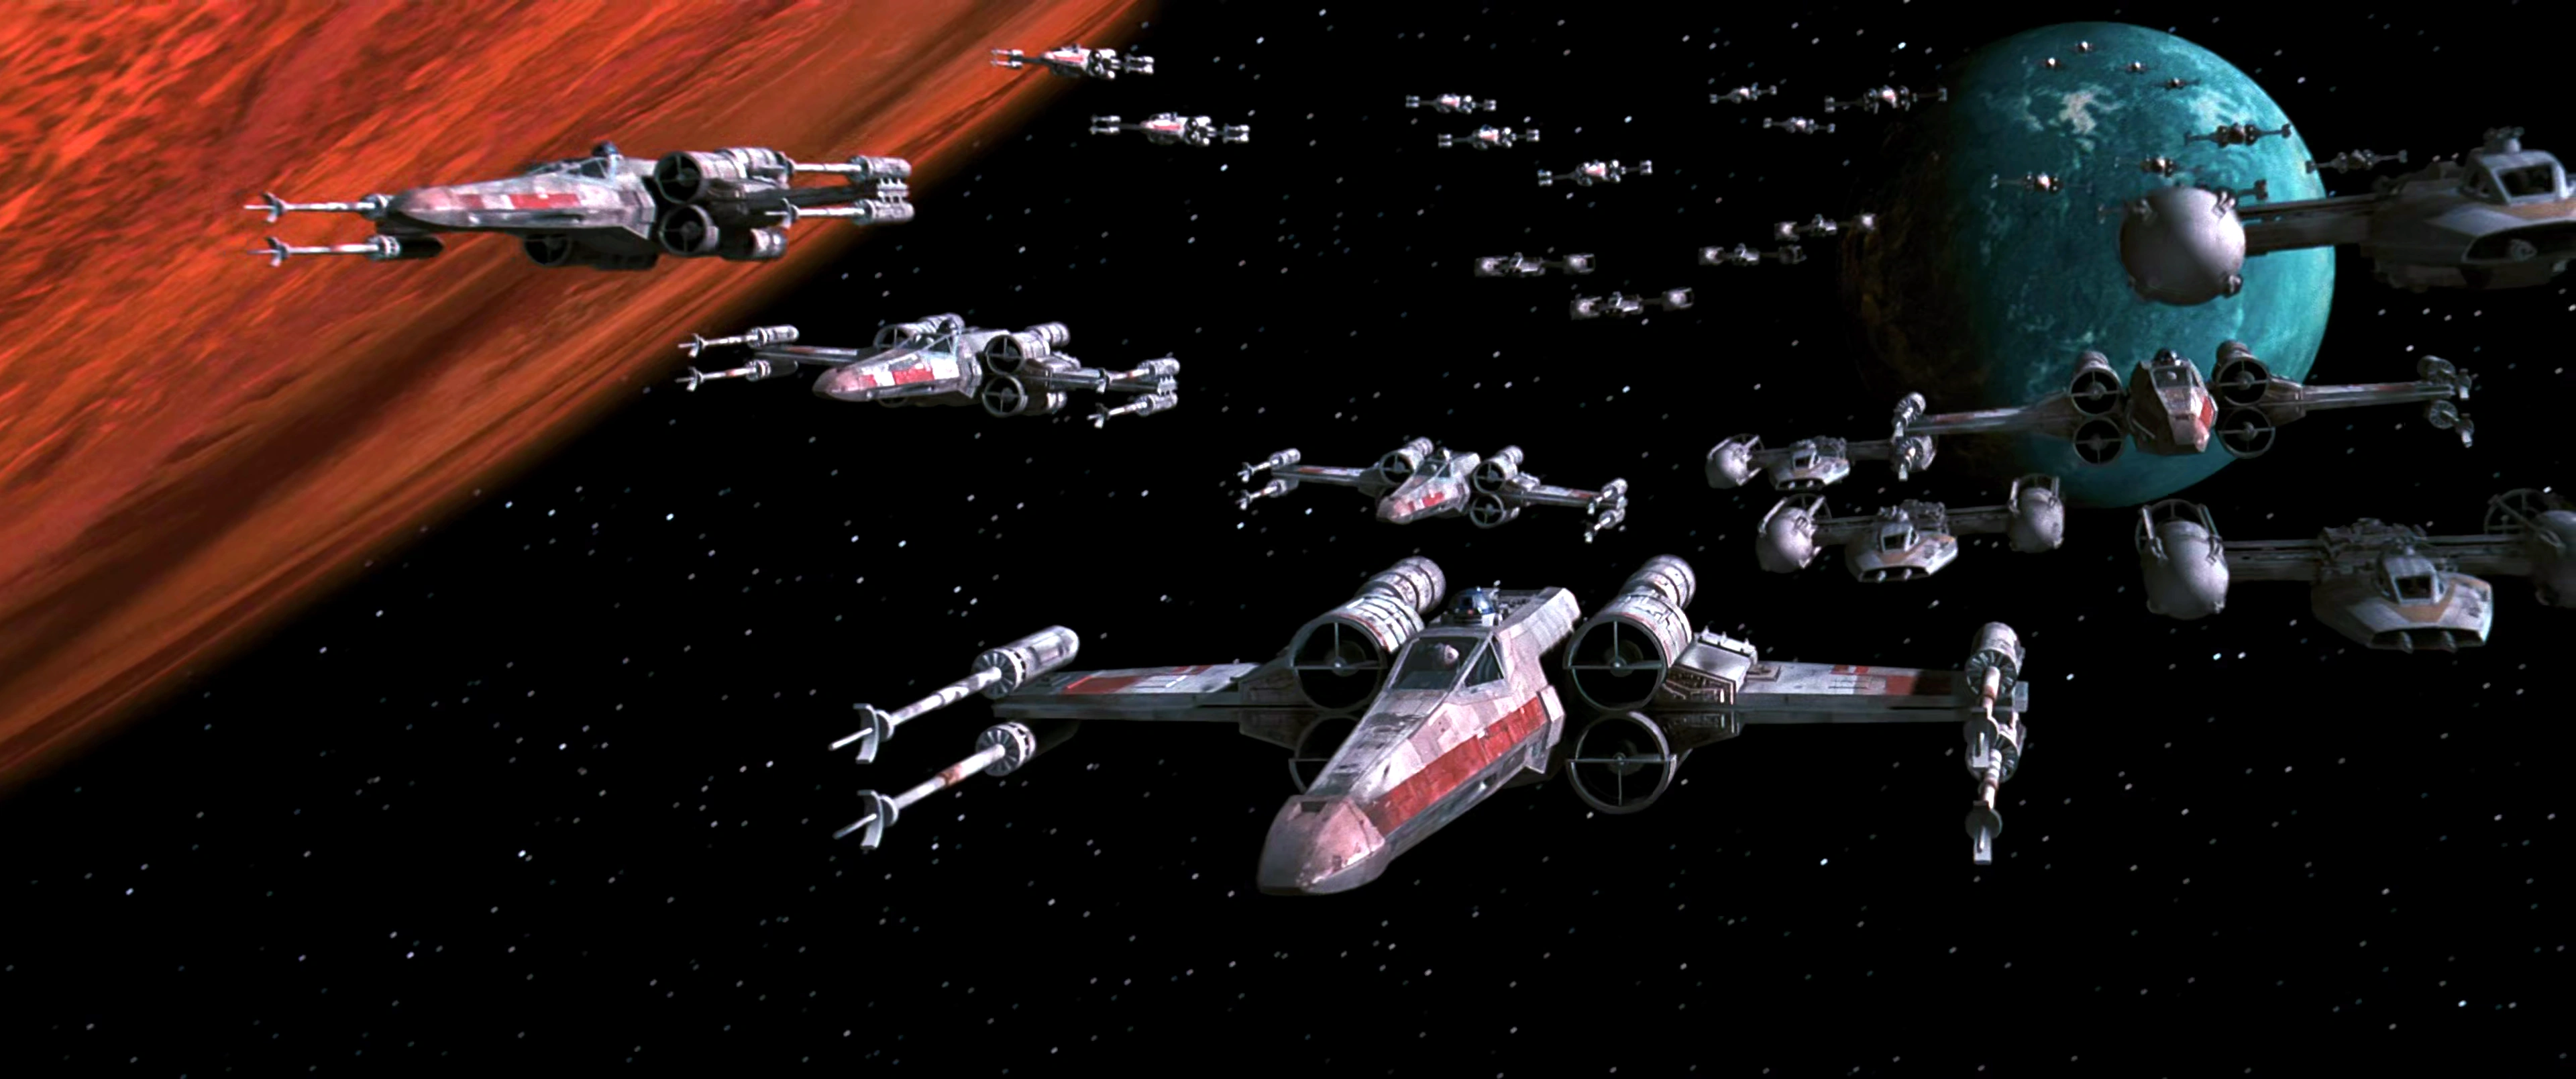
 Ralphs work was so important and valued by the franchise that George Lucas made sure that the shots in the movie replicated his paintings exactly. This is why his Star Wars portfolio is so vital to the overall aesthetic of the original trilogy. There are also many examples of where some of Ralph McQuarries art work has been re-used to aid other parts of the Star Universe, outside of the original trilogy. One of many noticeable examples of this is the design of Zeb Orrelios from the Star Wars Rebels animated TV series. With this side by side comparison, you can clearly see that Zeb’s character design is heavily based off of the original concepts of everyone’s favourite walking carpet, Chewbacca.


 But if I’m honest one of my favourite pieces done by Ralph has got to be the piece which appears to be set on Cloud City, where we see lightsabre wielding Storm troopers for the first time; maybe this could’ve been inspiration for the Storm trooper TR-8R in the Force Awakens, who knows.
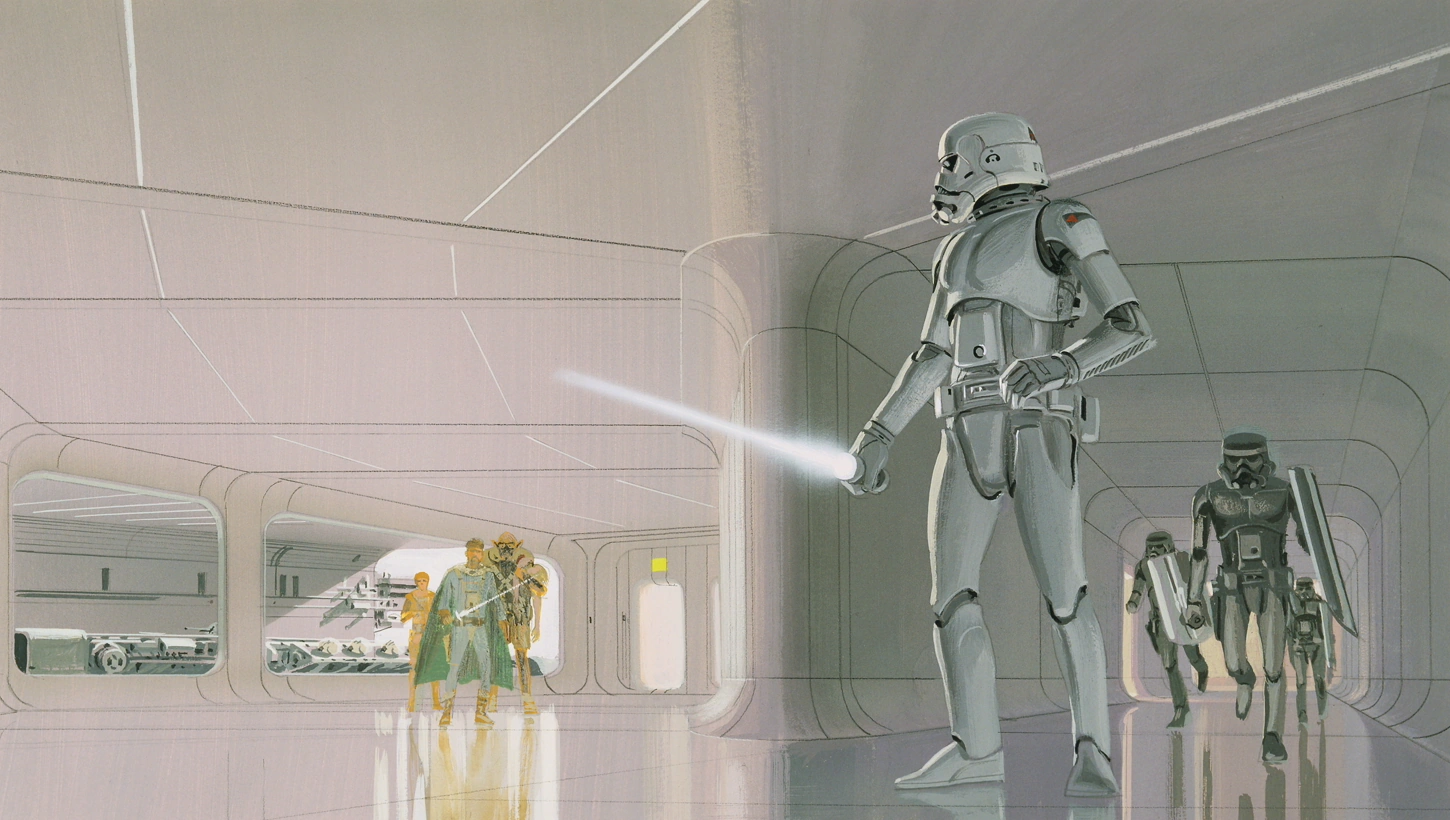
 Every artist has their inspiration no matter if it’s a specific movement or artist; Ralph McQuarrie is no exception. From all of the production paintings McQuarrie produced, it was the concept of R2-D2 and C-3PO wandering the desert that was completed first.
 If you analyse the painting very closely, it’s quite apparent that Art Deco movement may have heavily inspired McQuarries piece. What do I mean by this? Well if you compare C-3P0 to the Art Deco robot, Mashinenmensch from Fritz Lang’s film from 1927, Metropolis, then you’ll notice that the resemblance is uncanny.
 Not only did this painting start the design of C-3PO off, but it also had an impact on the actor who would later play him, Anthony Daniels.
 Daniels even said himself that the figure of McQuarries design had ‘a rather wistful’, ‘yearning’ and ‘rather bereft quality’ which Daniels ‘found very appealing’. Thanks to McQuarries painting, Daniels accepted the role as C-3PO.
 Despite not working on the prequel trilogy and experiencing creative fatigue, it’s safe to say that Ralph McQuarries work has definitely inspired the Star Wars Universe as a whole. He may not still be around today but thanks to his influence, he has truly left his mark on the world of cinema with his work on Star Wars.
 So with this in mind I created an entire concept piece from scratch in Photoshop, trying to illustrate how I thought the scene should look. The piece took me roughly 5-6 hours to really get right. It may not be the best piece produced for the project but its noticeably one of my best pieces that I’ve produced all year. Here’s part of a time-lapse of me drawing the piece and below that the final piece itself…
 Overall I’m very happy with how this piece turned out and I think that it’s definitely improved my digital art skills.


 But we did in fact encounter some issues. These were mainly issues in post. For example some scenes looked incredibly grainy due to the lighting being low and the ISO on the camera being cranked up as a result, therefore causing the grainy look; we even encountered some issues where some shots were the polar opposite and were over exposed, sometimes causing light to over power the subject or camera in terms of lighting. Another issue was that there was too much motion blur in some pieces of footage, this was an issue for tracking mainly as sometimes the tracker would be thrown off position in After Effects whilst tracking an object or person. This was due to the shutter speed being slow which as a result created more motion blur when the subject or camera was moving.
 Reflecting back on the filming dates, I think that there is definitely room for improvement if we were to do a project like this again. For instance, I’d make sure that the shot supervisor was fully aware of what they were doing before starting and were fully educated on the basics of cameras, ISO and shutter speed, therefore giving shots a more polished look and making thinks easier to track in post. I would also make sure that we had the right equipment. What i mean by this is perhaps a microphone for better audio quality and different types of tape for markers so that the actors knew where they were going to be in the next scene and so on.
 Well in our first meeting, we were shocked to discover that out of the many actors that put their name down to take part, only 3 of them turned up. Meeting after meeting, week after week, the less the actors turned up; at one point no one turned up at all. This was unacceptable and wouldn’t be tolerated in the industry and with that being said, this had to be our mindset during this time. So with this we got rid of the actors, since all we really got from them was test footage.
 I also did the same to the hooded figures however instead of blue, I textured them red…
 Pretty simple right? Before I animated however there was one last thing that needed adding to the pre-vis; the scene its self. For the scene I added 3 cubes to represent houses and buildings and I created a lamppost and duplicated it a few times. Giving me this result…
 Then to make the scene a bit smoother (for personal preference), I clicked a few settings on such as anti-aliasing and motion blur to make the scene look better…
 Then I animated the scene. The video below contains all of our pre-vis’ compiled into one video for easy viewing.
 Well since my last blog, I’ve made a lot of progress on my portfolio model. I’ve completed the rest of the characters body and even prepared the model for Mudbox work by UV unwrapping the model. In this post I’ll be going over the progress I’ve made over the past few weeks.
 Honestly I was very happy with how the foot had turned out. Then I went on to create the characters hands. This was a tricky part for me. For this part, I extruded from the wrist to create the palm, from there I created many edge loops; this was so that I could create room for the fingers and in between the fingers too, kind of planning it out before I started modelling in the fingers. Soon after, I started to model the fingers. To create the thumb, I extruded out from the side of the hand and then shaped the thumb until it looked right. Also I decided to give my character 3 fingers and a thumb, mainly because thats what you usually see on TV with cartoon characters and some animated ones too and that was the kind of look I wanted to go for. The result of the hand is shown below…
 Now that the hands had been made, my model was complete and overall the model looked pretty good. Obviously this is the low poly version so it doesn’t look very detailed yet but I’m ambitious that in the end it will look very nice. The full model is shown below (wireframe shown underneath)…
 Now it was time for me to do the UV’s for the model. As I created the UV’s, I moved them to one side and in the end looked like so, In this image the UV’s for the left part of the model are on the top and the UV’s for the right part of the model are on the bottom, with the UV’s for the head and chest area being placed way over to the right…
 Then I had to layout my UV’s and with that I laid the UV’s out like so…
 Just to make sure that everything was in order, I added a checker texture to the model to see how the UV’s turned out…
 Honestly I think that they may need a bit tweaking here and there but I’m happy with how they turned out so far.
 So over the course of our Wednesday and Thursday sessions in college, myself and the team decided to take some reference and on location photos (known as reckies) to create our storyboard, as apposed to drawing out the storyboard instead. We agreed on doing this because it would help save some time so that we could recruit actors and make a start on filming. This also meant that we could experiment with some of the images we took and take them into Photoshop so that maybe they could inspire our work in After Effects later on in production. A behind the scenes video about the reckies will be posted some time soon to go into more detail. What i ended up doing as team leader, was setting each member of the team a photoshop piece to complete to contribute to the storyboard and designs of certain assets, mainly the eye effect. The slideshow below shows some of my individual work that I produced for the story board…
 So I thought that in this blog post I’d talk about the trip briefly and how the atmosphere in Disneyland was incredibly inspiring!
 So after about a 14 hour coach trip followed by 7 hours sleep, myself and my friends decided to begin exploring the parks, starting with the Disneyland park and the Walt Disney Studios park the following day.
 In short, the rides were amazing and each section of the parks felt unique in their own way. When I wasn’t on the rides I took in the unbelievable scenery and the close attention to detail Disney had included inside of the park.
 From Thunder Mountain to Main Street USA, the environments never failed to impress me and with me being very creative person, the environments Disneyland had to offer for me were inspiring; especially with the unbelievable amount of effort put into the presentation of the parks. But hey, what do you expect from Disney?
 Another thing I really found interesting about the parks were the sense of immersion each ride/ area had. For instance the Tower of Terror genuinely creeped me out just by the exterior and interior design alone!
 Paintings glaring at you to the wall crumbling to pieces, it was very creepy and unnerving yet at the same time unbelievably clever, cool and creative; to top it off the build up to the ride felt worth it and definitely delivered.
 Another good example would be the Rock ‘n’ Rollercoaster, before you entered the ride it felt like you were entering backstage at an Aerosmith concert due to tonnes of music memorabilia and posters being placed all over the place; not to mention the ride was awesome!
 The light shows were also another highlight from the Disneyland visit, mainly because of how they were presented: they were presented through high quality, pixel perfect projections and looked amazing. Below is a clip of some footage I recorded of the Star Wars light show I went to on the Thursday evening…
